MobaSSH documentation
a. Monitoring the service with the installer interface
b. Monitoring with the Windows services interface
c. Monitoring with the dos services command
d. Advanced options for MobaSSH service
c. Getting information on your computers pool
d. Monitoring your system and network
5. Setting up a passwordless connection
6. Real-life example: Using MobaSSH for silent ("unattended") installations
a. Installing an "MSI" package on a remote computer, without user interaction
b. Installing a setup packages with Inno Setup
1. Installing MobaSSH
a. One-click installation
So you want to give MobaSSH a try? Fine. Let's begin by downloading the MobaSSH installer from here.
Log on to the remote computer that you want to administer. Start the downloaded program and click on the "Install it now" button on the left panel.
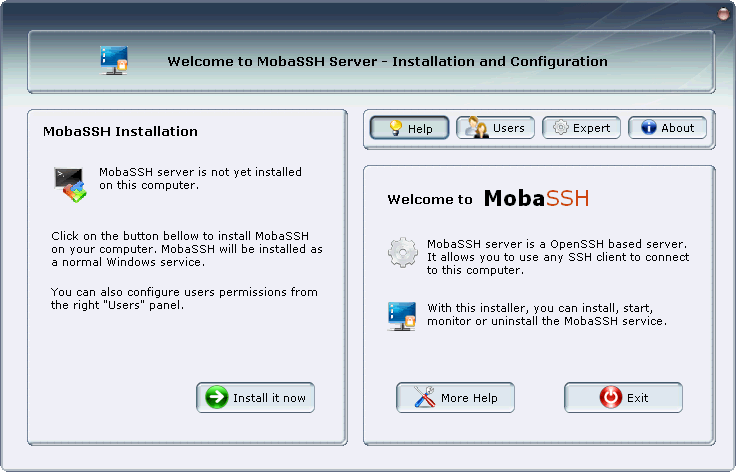
Wait until the service is installed and started. You're done! Your SSH server is ready and you can immediately log on to it through the network.
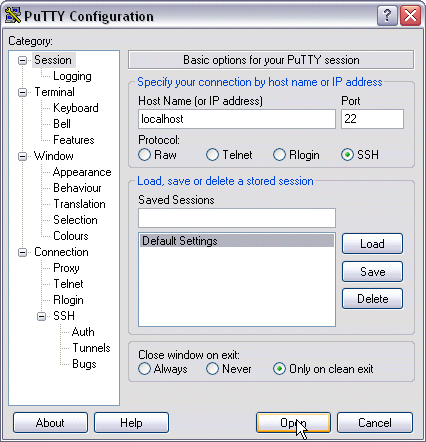
We recommend you use the great SSH client "PuTTY" in order to test the SSH server: just start PuTTY on the same computer and try to connect to "localhost", with protocol "SSH" (port "22").
b. Advanced installation
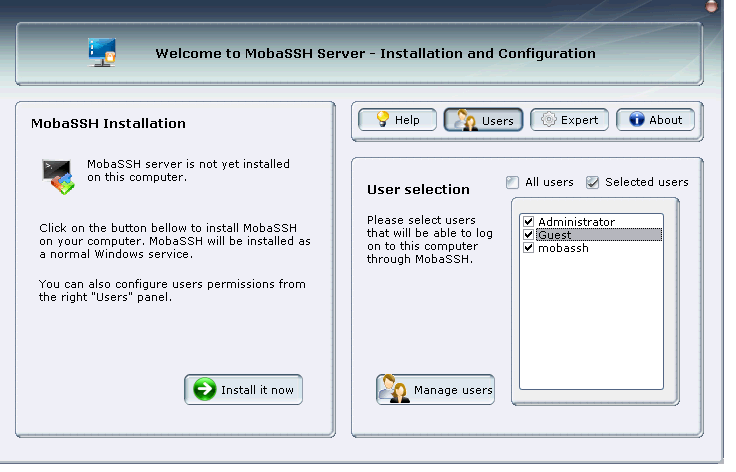
MobaSSH installer allows you to select which users will be able to log on to the computer through the SSH server. Note that MobaSSH server authentication is based on Windows authentication, so the login/password are the same as Windows ones.
2. Monitoring the SSH server
a. Monitoring the service with the installer interface
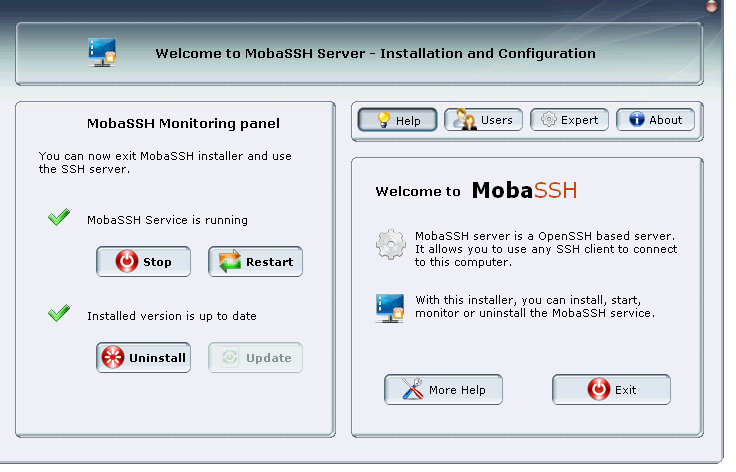
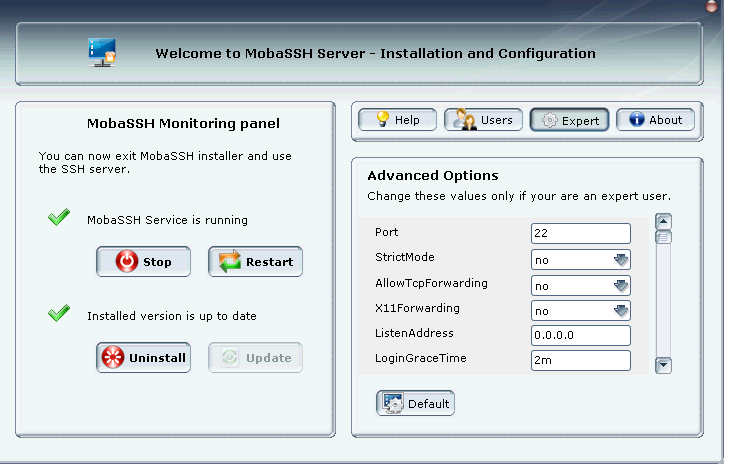
Once you're done installing MobaSSH, you can check if the SSH server is running and if it is up to date. You can then start, stop or restart the MobaSSH service by clicking on the appropriate button on the left side of the installer.
If you want, you can also enable/disable some users accounts, you will just have to restart the service for the changes to take effect, by clicking on the "Restart" button.
b. Monitoring with the Windows services interface
MobaSSH runs as a normal Windows service, so you can of course monitor it through the Windows interface.
Just go to the Configuration Panel, select "Administration Tools" and then start the "Services" interface. You will see a line beginning with "MobaSSH". Here you are, you can start/stop/restart/monitor the service from here.
c. Monitoring with the dos services command
MobaSSH can also be started or stopped through the shell command prompt: just call "net start MobaSSH" to start the service or "net stop MobaSSH" to stop it.
d. Advanced options for MobaSSH service
MobaSSH allows advanced users to modify options of the MobaSSH services. You can access these options on the Expert panel.
AllowTcpForwarding
Specifies whether TCP forwarding is permitted. The default is``yes''. Note that disabling TCP forwarding does not improve security unless users are also denied shell access, as they can always install their own forwarders.
AuthorizedKeysFile
Specifies the file that contains the public keys that can be used for user authentication. AuthorizedKeysFile may contain tokens of the form %T which are substituted during connection set-up. The following tokens are defined: %% is replaced by a literal '%', %h is replaced by the home directory of the user being authenticated and %u is replaced by the username of that user. After expansion, AuthorizedKeysFile is taken to be an absolute path or one relative to the user's home directory. The default is ``.ssh/authorized_keys''.
ChallengeResponseAuthentication
Specifies whether challenge response authentication is allowed.The default is ``yes''.
GatewayPorts
Specifies whether remote hosts are allowed to connect to ports
forwarded for the client. By default, sshd binds remote port
forwardings to the loopback address. This prevents other remote
hosts from connecting to forwarded ports. GatewayPorts can be
used to specify that sshd should allow remote port forwardings to
bind to non-loopback addresses, thus allowing other hosts to con-
nect. The argument may be ``no'' to force remote port forward-
ings to be available to the local host only, ``yes'' to force
remote port forwardings to bind to the wildcard address, or
``clientspecified'' to allow the client to select the address to
which the forwarding is bound. The default is ``no''.
ListenAddress
Specifies the local addresses sshd should listen on. The follow-
ing forms may be used:
ListenAddress host|IPv4_addr|IPv6_addr
ListenAddress host|IPv4_addr:port
ListenAddress [host|IPv6_addr]:port
If port is not specified, sshd will listen on the address and all
prior Port options specified. The default is to listen on all
local addresses. Multiple ListenAddress options are permitted.
Additionally, any Port options must precede this option for non
port qualified addresses.
LoginGraceTime
The server disconnects after this time if the user has not suc-
cessfully logged in. If the value is 0, there is no time limit.
The default is 120 seconds.
MaxAuthTries
Specifies the maximum number of authentication attempts permitted
per connection. Once the number of failures reaches half this
value, additional failures are logged. The default is 6.
PasswordAuthentication
Specifies whether password authentication is allowed. The
default is ``yes''.
PermitEmptyPasswords
When password authentication is allowed, it specifies whether the
server allows login to accounts with empty password strings. The
default is ``no''.
Port
Port Specifies the port number that sshd listens on. The default is
22. Multiple options of this type are permitted.
PubkeyAuthentication
Specifies whether public key authentication is allowed. The
default is ``yes''. Note that this option applies to protocol
version 2 only.
RSAAuthentication
Specifies whether pure RSA authentication is allowed. The
default is ``yes''. This option applies to protocol version 1 only.
StrictModes
Specifies whether sshd should check file modes and ownership of
the user's files and home directory before accepting login. This
is normally desirable because novices sometimes accidentally
leave their directory or files world-writable. The default is ``yes''.
Subsystem - Allow SFTP/SCP
Configures an external subsystem.
Arguments should be a subsystem name and a command to execute
upon subsystem request. The SSH implements the ``sftp'' file transfer subsystem. By default no subsystems are defined. Note that this option applies to protocol version 2
only.
X11Forwarding
Specifies whether X11 forwarding is permitted. The argument must
be ``yes'' or ``no''. The default is ``no''.
When X11 forwarding is enabled, there may be additional exposure
to the server and to client displays if the sshd proxy display is
configured to listen on the wildcard address (see X11UseLocalhost
below), however this is not the default. Additionally, the
authentication spoofing and authentication data verification and
substitution occur on the client side. The security risk of
using X11 forwarding is that the client's X11 display server may
be exposed to attack when the ssh client requests forwarding. A system adminis-
trator may have a stance in which they want to protect clients
that may expose themselves to attack by unwittingly requesting
X11 forwarding, which can warrant a ``no'' setting.
Note that disabling X11 forwarding does not prevent users from
forwarding X11 traffic, as users can always install their own
forwarders. X11 forwarding is automatically disabled if UseLogin
is enabled.
3. Executing remote commands
MobaSSH comes with a set of useful commands that you can use in a lot of cases:
a. System Administration
MobaTaskList / MobaKillTask: allow you to list/kill tasks that run on the distant Windows host
vmstat / top / ps: allow you to monitor the amount of CPU/RAM/other resources used by running processes
su / editrights / chmod / chown: allow you to manage users permissions
df / du: gives you information about available/used/total space in partitions or directories
mkshortcut: allows you to create Windows shortcuts with advanced parameters
regtool: allows you to easily access to the Windows registry and alter it
b. Centralized Backups
scp / sftp: allow you to transfer files through the SSH tunel
wget: allows you to download files through an http connection
rsync: allows you to do an incremental synchronization between directories from computers across the network
tar / gzip / cpio / afio: create archives, compressed or not, from command-line
md5sum: Generate or verify the CRC of your backup data
c. Getting information on your computers pool
MobaSwInfo: gives you some useful information about which program is installed on the computer
MobaHwInfo: gives you some useful information about the computer hardware specificities
d. Monitoring your system and network
TCPCapture: useful tool for capturing IP packets and monitoring open ports on the computer
MobaTaskList: lists the tasks that run on the distant Windows host
top: allows you to monitor the amount of CPU/RAM/other resources used by each process
telnet / ping: verify your connection with other computers over the network
e. Execute remote scripts
bash / awk / grep / sed / find / less / chmod / chown / cut / etc..: the most important utilities from Linux will help you creating remote scripts for your computer host
cmd: you can also of course execute remote .bat files through the SSH connection
4. Transferring files
a. Graphical interface
Transferring files to/from the SSH server is as easy as transferring files using the FTP protocol, but the connection is encrypted, so no one can see the data you transfer.
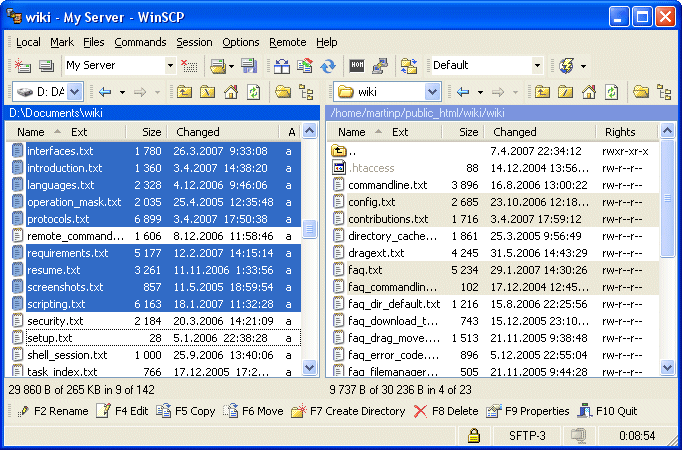
- For Windows users: we recommend you to use the great graphical client called "WinSCP". Just run it, enter your connection parameters and you will see a great interface with your local directories on the left side and the remote directories on the right side. Just drag and drop your files from one side to the other to transfer your files.
- For Linux users, you can use the graphical interface provided by Konqueror, Nautilus or a lot of other file managers.
b. Command-line utilities
- For Windows users, you can use the great command-line tool provided with PuTTY called "psftp", or the cygwin scp utility.
- For Linux/Unix/HP-Ux/AIX users, you can use the OpenSSH clients called scp or sftp.
5. Setting up a passwordless connection
You can connect to the SSH service without supplying any password: this is useful if you want to run shell scripts that are not interactive. This can be done in 2 steps:
a. On client side
You will have to generate a public rsa key on the client. This can be done in many ways depending on the client program you are using.
- PuTTY comes from a utility called "PuTTYgen" for doing it.
- With OpenSSH, just run the "ssh-user-config" script. It will create the public RSA key (usually stored in the ~/.ssh/id_rsa.pub or /etc/ssh/id_rsa.pub).
b. On server side
Copy the file that has been generated on the client ("id_rsa.pub") to the C:\Documents and Settings\<your_user>\.ssh\ directory and rename it to "authorized_keys".
You're done, you can now log in the SSH server with the defined client without typing any password.
6. Real-life example: Using MobaSSH for silent ("unattended") installations
In the following examples, the server is called "Server1" and the client is called "Supervisor1".
a. Installing an "MSI" package on a remote computer, without user interaction
- Transfer the MSI package to the remote computer using the "scp" command
scp Administrator@Server1 "MyApplication.msi" "/tmp/" - Connect to the remote server and run the MSI package silently under the "Administrator" account
ssh Administrator@Server1 "cd /tmp; msiexec /i MyApplication.msi /qn" - Here you are, the program was installed on the computer without any user interaction !
b. Installing a setup packages with Inno Setup
- Transfer the EXE setup file to the remote computer using the "scp" command
scp Administrator@Server1 "Setup.exe" "/tmp/" - Connect to the remote server and run the Setup executable silently under the "Administrator" account
ssh Administrator@Server1 "cd /tmp; ./Setup.exe /VERYSILENT /SP-" - You're done !
c. Other types of installers
A lot of installers can be run silently ("unattended" mode) by using the "/s" switch at command-line. In most case, these command-line switches can be found at program documentation.